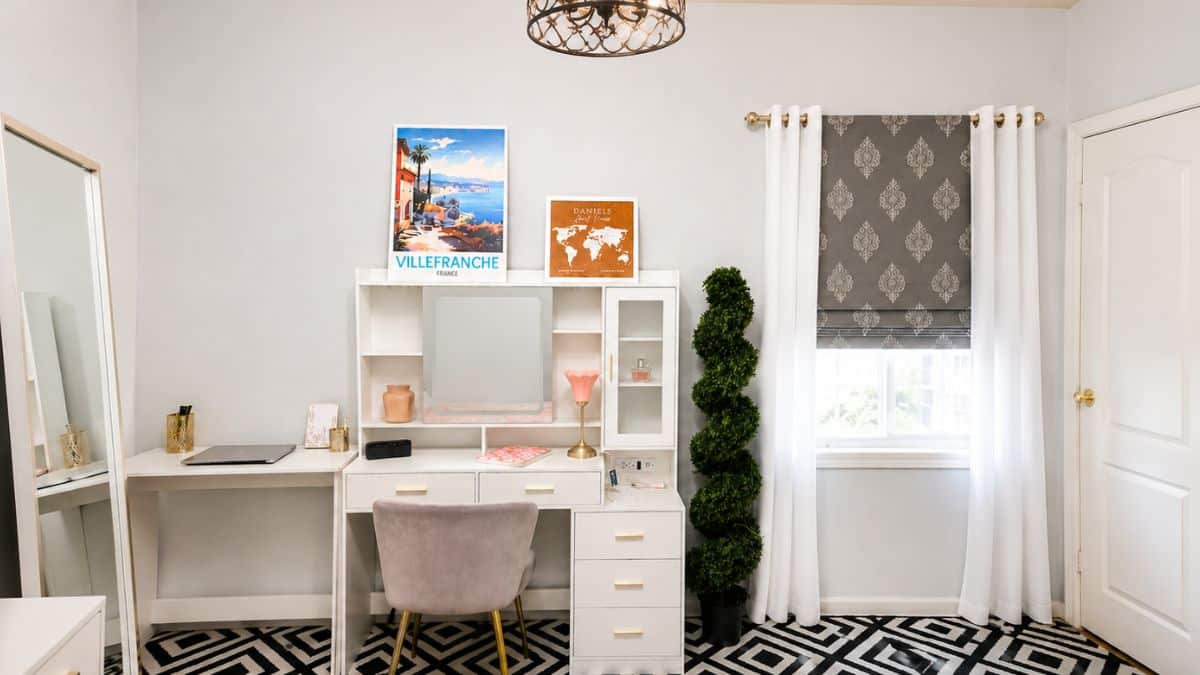
Whether you’re working from home full-time, starting a side business, or just need a more functional space, this step-by-step home office makeover guide can help you create a room that works for your lifestyle.
While my basic beige home office pictured below was fine for everyday tasks, as I spent time growing my travel blog and needed a place to take photos, I realized it was time for a home office makeover. I needed a brighter space for writing, editing photos, and staging product photos for my website – while still creating a comfortable guest room for family and friends.
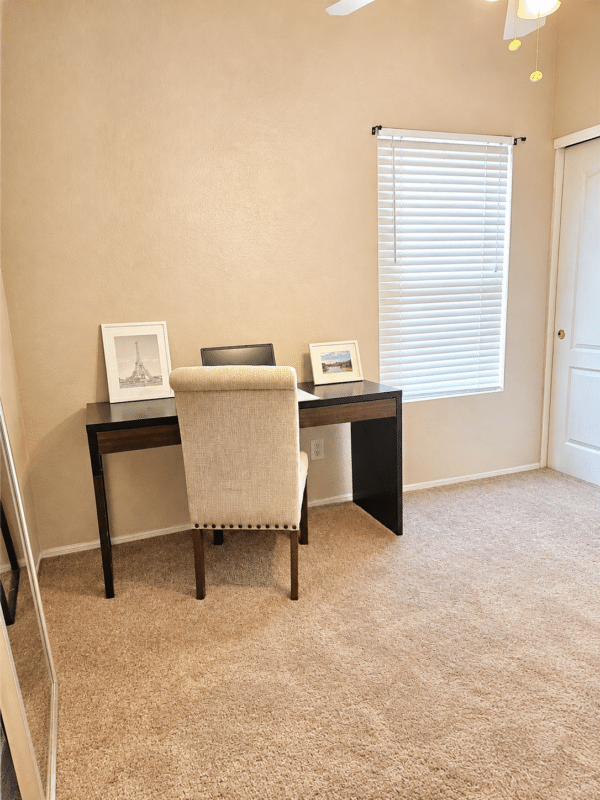
With a little planning, fresh paint, and versatile furniture, I transformed our spare bedroom into a stylish workspace that serves both purposes. In the steps below, I’ll walk you through the same process I used, along with practical tips to help you create a home office that fits your lifestyle and decorating style.
Step 1: Start with a Plan
The biggest time saver was planning the room before picking up a paintbrush.
Before starting, I had already decided on:
- My wall color
- The overall style I wanted
- Desk and storage
- Bedding
- Rug
- Lighting
- Window treatments
- Decorative accessories
Having a plan meant every purchase worked together, and I wasn’t making design decisions halfway through the project.
Step 2: Find Your Decorating Inspo Before You Shop
One of the biggest mistakes people make during a room makeover is buying furniture and décor piece by piece without a clear vision.
Before you start shopping, take a little time to gather inspiration for paint colors, furniture, and décor.
Tip: Create a Pinterest board or save inspiration photos. It helps you stay focused and avoid buying pieces that don’t fit your vision.
Sometimes inspiration comes from unexpected places, too. During a visit to my niece’s house, she showed me the beautiful dressing room she had created in her spare bedroom with pretty light fixtures and decor.
When you’re planning your room makeover, think about what inspires you. I also considered how I’d use the room, and chose a light gray-blue paint that would work good in photos.
For me, I wanted the room to capture some of the feeling of the boutique hotels and charming European destinations we’ve visited. That idea guided many of my decorating decisions, from the travel artwork to the soft color palette and elegant accessories.
Questions to Ask Before You Decorate
Before you start shopping, ask yourself:
- How do I want this room to feel? (Calm, cozy, modern, elegant, bright?)
- What colors make me happy?
- Is there a favorite destination, hobby, or style I want to reflect?
- Will the room have more than one purpose?
- Which pieces should be practical, and which are purely decorative?
Answering these questions first makes every decorating decision much easier.
My decorating tip: Don’t try to copy one room exactly. Instead, borrow ideas from several spaces and combine them with pieces that reflect your own personality and interests. That’s what makes a room feel like home.
Step 3: Completely Empty the Room
Don’t try to paint around furniture.
Move everything out of the room if possible. It makes painting much easier and allows you to see the space with fresh eyes.
Once the room was empty, I could easily tape the trim, remove wall plates, and move around with a ladder without constantly shifting furniture.
Step 4: Prep the Room for Painting
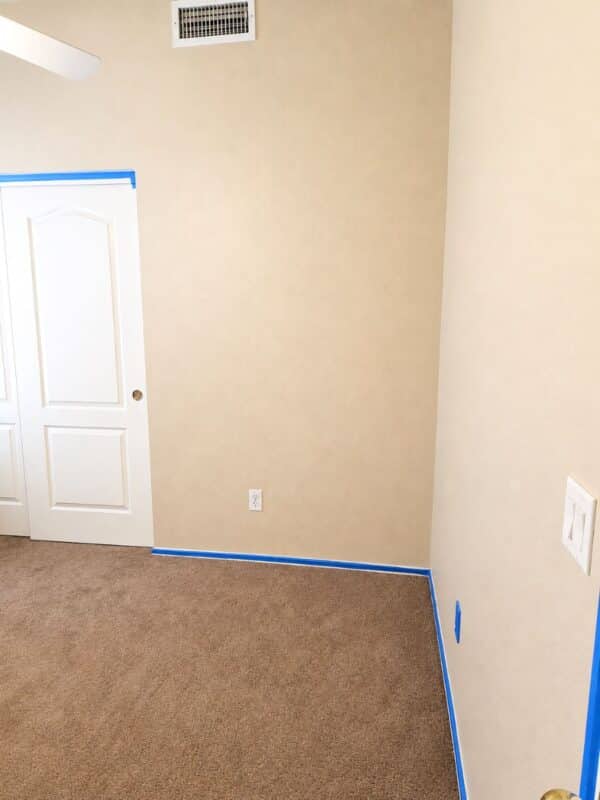
Taking a little extra time during prep makes a huge difference in the finished result.
Here’s are a few things to do to prep the room and make painting easier:
- Tape all baseboards with painter’s tape.
- Remove outlet covers and switch plates.
- Remove ceiling air vents before painting.
- Fill nail holes (painter’s putty).
- Protect your flooring.
- Use paint tray liners for easier cleanup.
Many of today’s interior paints already contain primer which helps save time since you won’t need to paint a base coat if you’ll be painting the walls in a similar color.
Bedroom Painting Supply Checklist
Before opening your first can of paint, gather all of your supplies so you won’t have to stop in the middle of the project. Having everything ready made the painting process much smoother for me.
Paint & Primers
Buying Paint: Before you go to the paint store, measure the length and width of your room (and note if you have tall or vaulted ceilings). Most paint stores can estimate how much paint you’ll need based on your room’s dimensions, helping you avoid buying too much – or making an extra trip back to the store.
- Interior wall paint (typically 1-2 gallons, depending on room size and whether you’re applying one or two coats)
- Most premium paints now include paint and primer in one, which can save time on previously painted walls.
- Recommended finish for bedrooms: Eggshell is a popular choice because it has a soft, low-sheen finish that’s durable enough to wipe clean. Flat paint also hides wall imperfections well but isn’t quite as washable.
Painting Supplies
- Short-nap roller (great for today’s thicker paint with primer)
- Roller frame
- Extension pole (optional but helpful for vaulted ceilings)
- Angled paint brush for edging around ceilings, trim, and corners
- Paint tray
- Disposable paint tray liners (makes cleanup much easier)
- Paint can opener or flat-head screwdriver
- Paint stir sticks
Surface Preparation
- Painter’s tape
- Lightweight spackling to fill nail holes
- Putty knife
- Fine-grit sanding sponge (for patched areas)
- Damp cloth or microfiber cloth to remove dust before painting
Room protection
- Canvas drop cloths or plastic floor coverings
- Old towels or rags for wiping up drips
- Plastic bags for protecting doorknobs or hardware (optional)
Tools You’ll Need
- Step ladder
- Screwdriver for removing:
- Light switch covers
- Electrical outlet covers
- Air vents
- Small container or zip-top bag to hold screws so nothing gets lost
Clean-Up Supplies
- Paper towels
- Mild soap and water (for latex paint)
- Trash bags
- Extra cloths for quick cleanup
My Best Painting Tip
One thing I discovered during this makeover is that paint today includes primer and is thicker than it used to be. I found that using a short-nap roller made the paint go on smoother and helped reduce splatter.
Step 6: Build Furniture in Advance
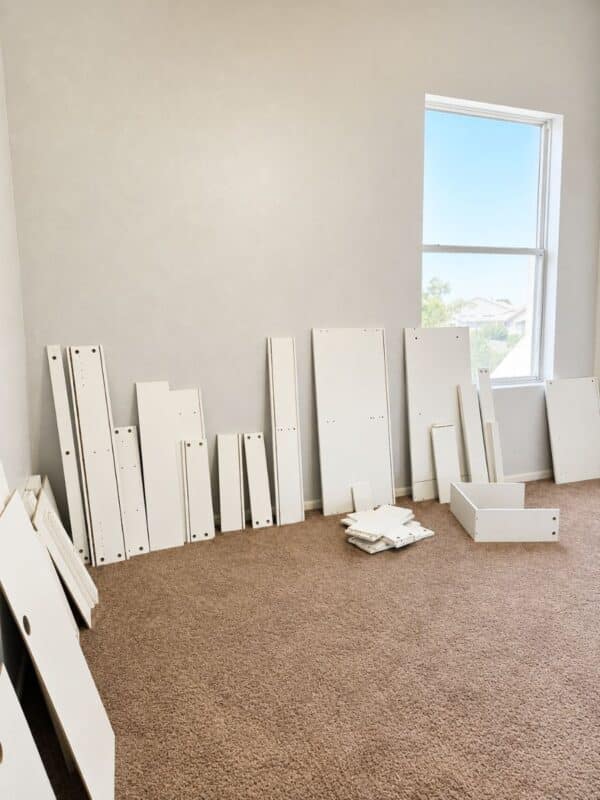
The vanity I chose became the focal point of the room. It provides storage, a workspace, and looks much more like furniture than a traditional office desk.
One thing to know before starting: Assembly takes time.
For this vanity, there were dozens of pieces to unpack, organize and assemble. If you’re buying new furniture, build it before you begin decorating. This project took about 6-8 hours (thanks to my husband for building it!).
Tip: Having all of the numbered pieces organized makes the assembly process go smoother.
Add a Small Desk Extension
The vanity is narrow which works well for a small bedroom. However, the desktop area mainly has room for my laptop with only a little space left for writing or spreading out papers.
To create a more functional workspace, I added a simple standalone desk next to the vanity. I can place it in a straight line to make the vanity look more like a built-in desk, or turn it to create an L-shaped workspace when I need additional room.
This flexible setup gives me more surface area (like for my monitor) without committing to a large traditional office desk, and I can easily move or reposition the desk when guests use the room.
I’ve also found another use for the desk. When I photograph smaller travel products for my blog, I’m able to set up my tabletop photography boards (a gift from my niece) on the desk extension, giving me extra space to style and photograph products without taking over the rest of the room.
Small-space tip: Look for furniture that can serve more than one purpose. You may discover new ways to use it as your needs change.
Step 8: Create a Space That Works for Your Hobbies or Side Business
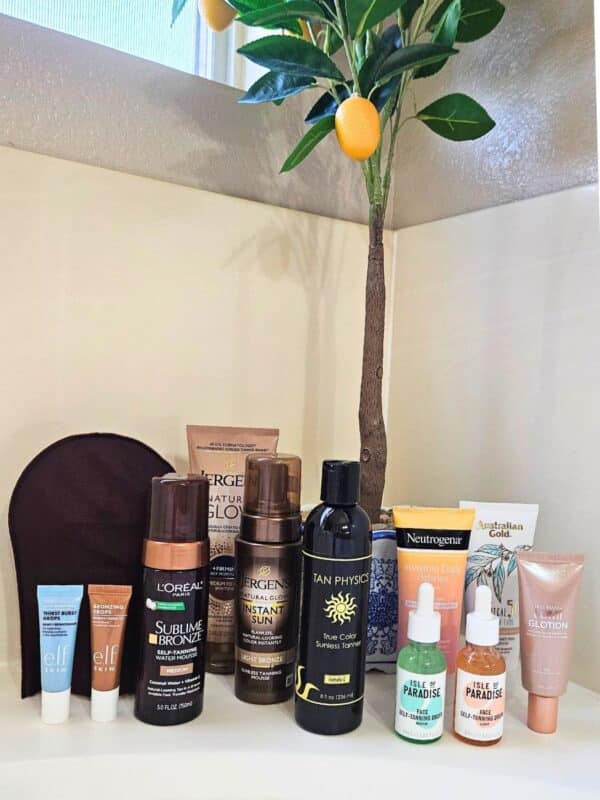
One of the biggest reasons for this makeover was creating a brighter space where I could photograph products and stage flat lays for my travel blog. I wanted to have one room where I could easily create content instead of setting up temporary photo areas around the house like for my sunless tanning blog,
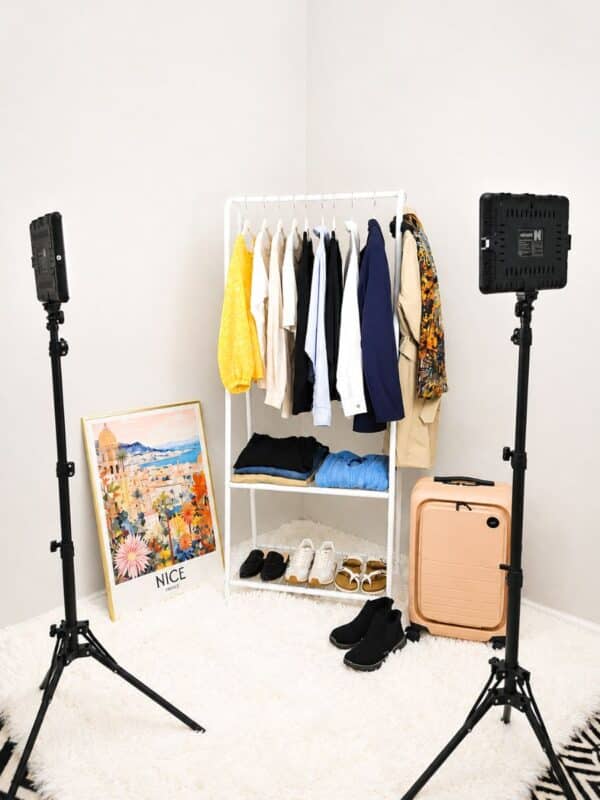
Having dedicated space to photograph travel gear, clothing, and accessories has made creating blog content much easier. For this wardrobe photo shoot for my packing tips blog, I used two LED panel lights, a simple clothing rack, and a soft rug to create a clean backdrop
When you’re planning your room, think about how your home office can support your hobbies or interests. Maybe it’s a place for crafting, sewing, photography, painting, or wrapping gifts. Designing your office around how you’ll actually use it makes the room more functional and enjoyable every day.
Step 9: Layer Color, Texture, and Pattern
Instead of filling the room with lots of décor, I focused on a few design elements that added interest.
For this makeover I used:
- Soft gray-blue walls
- Crisp white furniture
- A bold black-and-white geometric rug
- White curtains with a Roman shade
- Gold accents
- Soft velvet upholstery
- Layered bedding and pillows
Mixing textures keeps a neutral room from feeling flat.
Design Tip: Limit your room to one or two accent colors. Repeating the same colors throughout your furniture, artwork, textiles, and accessories helps a small room feel cohesive rather than busy.
Step 10: Choose a Theme That Reflects Your Personality
Before buying artwork or accessories, spend a little time thinking about the feeling you want the room to have. One of the easiest ways to do this is by creating a Pinterest inspiration board and saving rooms, colors, furniture, and décor that immediately catch your eye. After a while, you’ll probably notice a pattern in the styles you’re drawn to.
For my office, I realized I kept saving spaces that felt like a boutique hotel – bright, elegant, and inspired by some of our favorite European travels. That became my decorating guide.
Instead of trying to match every accessory perfectly, I focused on a few repeating elements:
- Soft gray-blue walls
- Crisp white furniture
- Black and white geometric patterns
- Gold accents
- Travel-inspired artwork
- Greenery to bring life into the room
- Soft pink accessories for a subtle touch of color
Having a consistent theme made decorating much easier because every new piece had to fit the overall look I wanted to create.
Step 11: Add Personal Touches With Meaningful Accessories
One of my favorite decorating tips is to include pieces that have meaning rather than filling a room with generic décor.
Since we enjoy traveling, I incorporated artwork that reminds me of some of our favorite destinations. The Villefranche, France print above my vanity instantly transports me back to the French Riviera and adds a bright pop of color to the room.
Another favorite piece is the custom cork world travel map that was a thoughtful gift from one of my nieces. It was created by Etsy seller LumevaLux. I love that it is decorative and meaningful. It has separate pins to mark your past travel adventures and pins for new adventures.
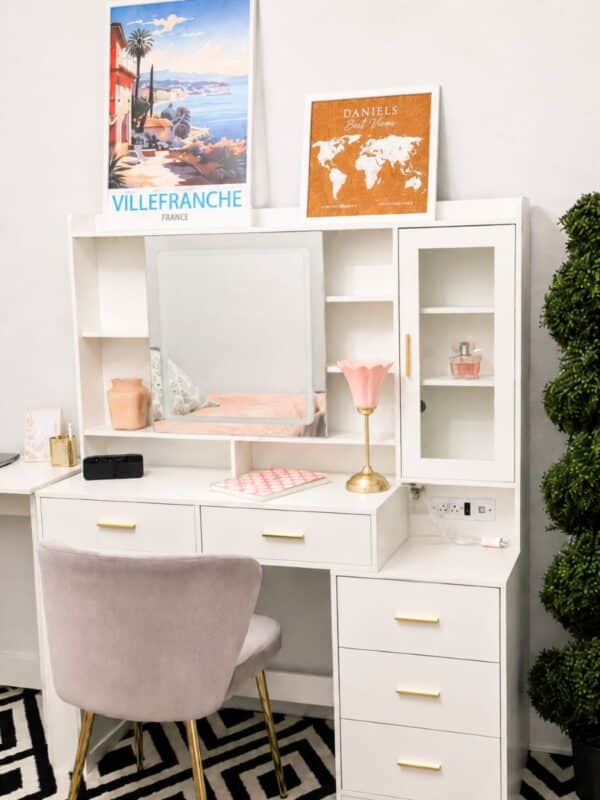
To finish the space, I added a few simple accessories:
- A faux spiral topiary for height and color
- A soft pink glass lamp for warmth
- Gold desk accessories
- A tall floor mirror to reflect light and make the room feel larger
I intentionally left plenty of open space on the shelves and desktop because I didn’t want the room to feel cluttered.
Step 12. Think About Lighting
Lighting completely changes how a room feels. I replaced the standard ceiling fan with a chandelier-style fixture that immediately gave the room a more finished look.
One thing about the light fixture I didn’t anticipate is that the decorative crystals cast shadows on the walls.
Still, for everyday use it’s one of my favorite features (it even has a fan). When choosing lighting think about how you’ll be using your room. When I take photos, I also use LED panel lights to brighten the room.
Step 13: Style the Bed Like a Daybed
Since this room serves two purposes, I wanted the bed to feel more like seating during the day.
Layering oversized pillows, a textured duvet, and decorative cushions helped create a daybed look that works beautifully as both an office and guest room.
It’s one of the simplest changes that made the room feel less like a bedroom and more like a multi-purpose space.
My Best Tips for Your Own Weekend Office Makeover
- Plan your design before buying anything.
- Empty the room completely before painting.
- Choose furniture that serves more than one purpose.
- Invest in lighting you love.
- Use a short-nap roller with today’s thicker paints.
- Add personality through artwork and meaningful accessories.
- Don’t overcrowd shelves or tabletops—leave some open space for a clean, relaxed feel.
Ready to Start Your Home Office Makeover?
Transforming this spare bedroom became one of my favorite home projects because it solved several needs at once. Instead of having a room that sat unused most of the time, we now have a bright, functional home office that also provides a comfortable place for guests to stay.
If you’ve been thinking about updating your own space, don’t wait until everything is perfect. Start with a plan, gather inspiration, and tackle one project at a time. You might be surprised how much you can accomplish in a weekend.